Table of Contents
Universal Robots UR10 robot arm

Collaborative robot-arm
References:
Software
- Other possible control software
- Python
Polyscope (the teaching pendant)
Define TCP
- Click ‘new’ (you cant rename TCP’s)
- Define the position
- Enter the offset by measuring, or use the wizard. The wizard lets you orient the physical TCP around a point in 4 different positions.
- Define the orientation (optional)
- Enter a custom orientation in case the TCP is not normal to the flange.
- Define a tool weight and center of gravity.
- Click ‘set as default’
- Save the installation setting (on the left bar)
Test the setup:
- rotate the robot around the TCP on the teaching pendant (move tab). The tool tip should stay still in space while the rest of the robot rotates around it.
RoboDK
- Direct computer-robot ethernet connection doesn't work. You need a switch or a router. The computer's IP address should be set to DHCP.
Grasshopper
Grasshopper runs inside Rhino 7. In order to control the robot arm, a Grasshopper plugin is needed: Robots.
The Robots plugin
Installation
- In Rhino, go to
Tools > Package Managerand select theonlinetab. - Search for 'Robots' and select the 'Robots' plugin. If you select it, check the Github url: the author is visose.
- Select version
1.4.1and click install (restart Rhino after).- Everything below version
1.5.0probably works. - Briefly tested versions:
1.0.1,1.3.0,1.4.1seem to work.1.5.0,1.6.0are too new for the get-current-position-script (see below).
Robots.dll file
If Rhino keeps asking to locate the Robots.dll file, here's a tip. Make all grasshopper projects (files with a .gh extension) writable. This way you'll need to reference the location of the robot.dll file only once.
- On mac: cmd + i, under sharing & permissions, change the privilege of 'everyone' to Read & Write.
- Location of the robots.dll file:
username/Library/Application Support/McNeel/Rhinoceros/packages/7.0/Robots/1.4.1/Robots.dll
Guides
- There are a few example files in ('Robots-master > Documentation > Examples')
- I followed this getting started video.
- Robots guide by Fab Lab Barcelona (almost a complete copy from Robots How-To-Use).
- Drawing with robots video tutorial. Uses KukaPRC instead of 'Robots', but workflow might be useful.
I tried adapting the 'simple example' by changing the Kuka robot to a UR10 robot. It works, but the initial position is all wrong. In this guide Joonhaeng Lee at MIT's center for bits and atoms describes a solution to this problem.
Tips
- The first target should be a joint target. Following ones can be cartesian targets.
Upload script to robot
- Small programs can be streamed directly to the robot with the 'Remote Connection' module.
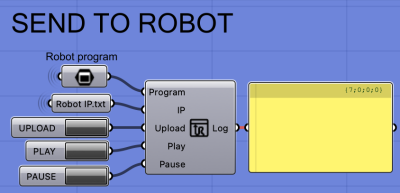
- Send the program to the robot by clicking 'Upload'.
- The arm starts moving without warning(!).
- With larger programs (1000+ targets(?)), there might be a delay after clicking upload and the arm moving.
- Larger programs (2500+ targets) cannot be streamed. Use the 'Save Program' module.

- This file is created right away (it's streamed).
- Change the .URS extension to .script
- Open the script in a script editor, copy the function name at the top, and add to the bottom
result = programName(). Now the program will actually be ran. Maybe this is an incompatibility between the e-series and the previous versions. Might be changeable in the post processor C# script. - Upload to the robot via SFTP (place it somewhere in the map '/programs').
- Make a new program, add the script module, change it from line to file, and load the file from the programs folder.
- This doesn't work for large files though. People are talking about splitting it up into sections. But it's unclear to me how.
- 485 targets works
- 24673 targets already doesn't want to load :(


URRealtimeFeedback plugin for Robots
This is a grasshopper file with some builtin scripts that allows to receive the current pose of the robot arm.
Setup
- Do not connect to the LAN network of KASK. Instead connect to the robot arm directly, or via a separate switch.
- Set the computer to a static IP address that is the same as the Robot's, except for the last number
Computer -------------- Robot arm
- or
Computer --- Switch --- Robot arm
Related 'Robots' projects
- Wirecutting with Grasshopper & Robots (video)
FTP connection
- Use FIleZilla
- Host:
sftp://192.168.185.99 - Username: root
- Password: easybot
- Port: 22 (also works without entering anything here)
Location of program (URP) or script (URS) files: /programs
RoboDK
Hardware
Toolhead connector
A suitable cable that mates to the toolhead connector is Lumberg RKMV 8-354
Broom handle attachment


3D printer (Clay)
In development

3D printer (Plastic)
In development

Pen plotter

Used by Diego Lama to scratch drawings into car parts
Drawing with the UR10 (RoboDK).
Drawing with the UR10 V2 (Grasshopper)
Webcam attachment


DSLR attachment
Hole drilling attachment


This tool head turns the robot into an automated hole drilling machine. Good for elaborate hole patterns that would be tedious to do manually.
Based on this design.
The 3D printed part attaches to a Grip toolchanger underplate (G-MGW063-2U).
Download the 3D files here.
Attach the clamps to the largest part with M4 screws and nuts.
Attach the largest part to the tool changer with 4 M5x16 low profile bolts and 4 M4 nuts